

Step 1: What Type of Deck is Right for You?

One of the first things you need to ask yourself before getting started is what type of LED lights you want and where you want them to go.

RGB
Full Color Functionality
- 16 Million Color Possibilities.
RGBW
+ Hyper White
- With the Addition of an Extra White LED allows you to achieve a brighter and more "Pure" White.

FLOW
Over 200+ Sequential Modes
- Gives you the option of 200+ Moving "Flowing" Light Patterns.
Important Notes
- These three different types CANNOT mix and match, for example FLOW strips CANNOT be combined with RGB strips. You can however run them separate with the use of multiple controllers.
- Example: In order to achieve RGB under-deck lighting, FLOW rail lighting, and RGBW Gazebo lighting like the picture above you would need to have 3 separate controls, one for RGB, one for RGBW, and one for FLOW.
- RGB, RGBW, & Flow are all available in both Bluetooth and RF Remote control options.
Step 2: Determine Your Track Length

After you have made your decision on where you want your lights and what type of LED lighting you want, we now need to figure out how many of each length track we need.
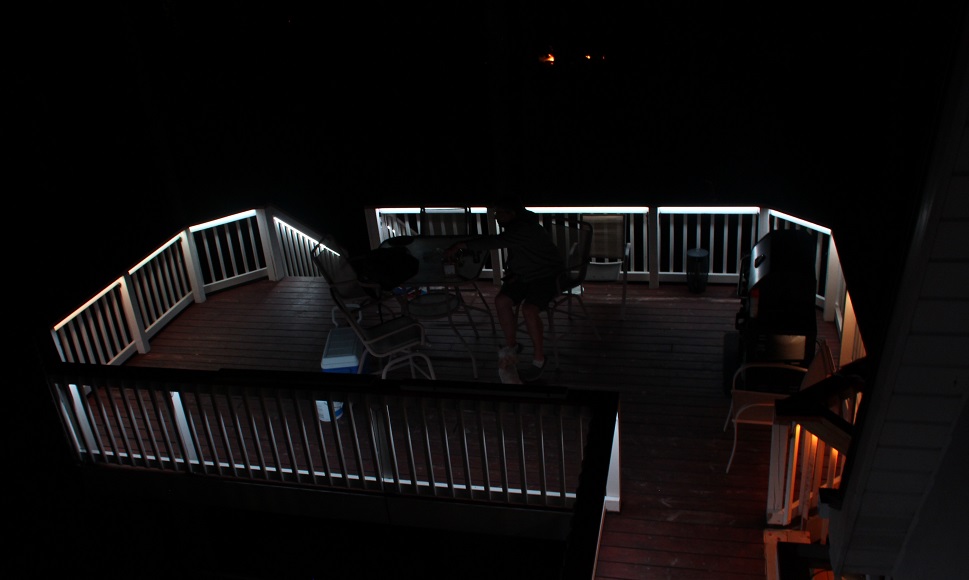
For our Flow Rail Lighting Application we simply measures the distance from post to post under the railing on the deck.
We then use those measurements to find what length tracks we need and how many of each.
Each track comes with one Butt connector allowing you to daisy chain to the next track inline. These Butt connectors once connected to the tracks give you roughly 16" of wire to play with. This is perfect for either wrapping around your support posts to the next track inline OR drilling a 3/4" hole through your posts and running the wire straight trough. HOWEVER if this 16" is not enough, for example you have to jump a stair case as depicted above, you can easily swap out the butt connector for an extension wire.
Now that we know how many LED tracks we need to complete our deck we can figure out what power supply we will need. In order to do this we need to add up the total length of LED track:
- If total length is Less than or Equal too 60ft we can use the 200W Power Supply
- If total length is more than 60ft and less than 150ft we can use the 500W Power Supply
The steps are fairly simple, I will use the FLOW under Rail lighting above as an example.
- Measure the distance from support post to support post
- EX: 42"
- Select the length of track that will fit between the Posts Under your railing.
- EX: 40" Flow Track
- Determine if extension wire is needed to reach next track
Step 3: Power/Control & Wire Extensions
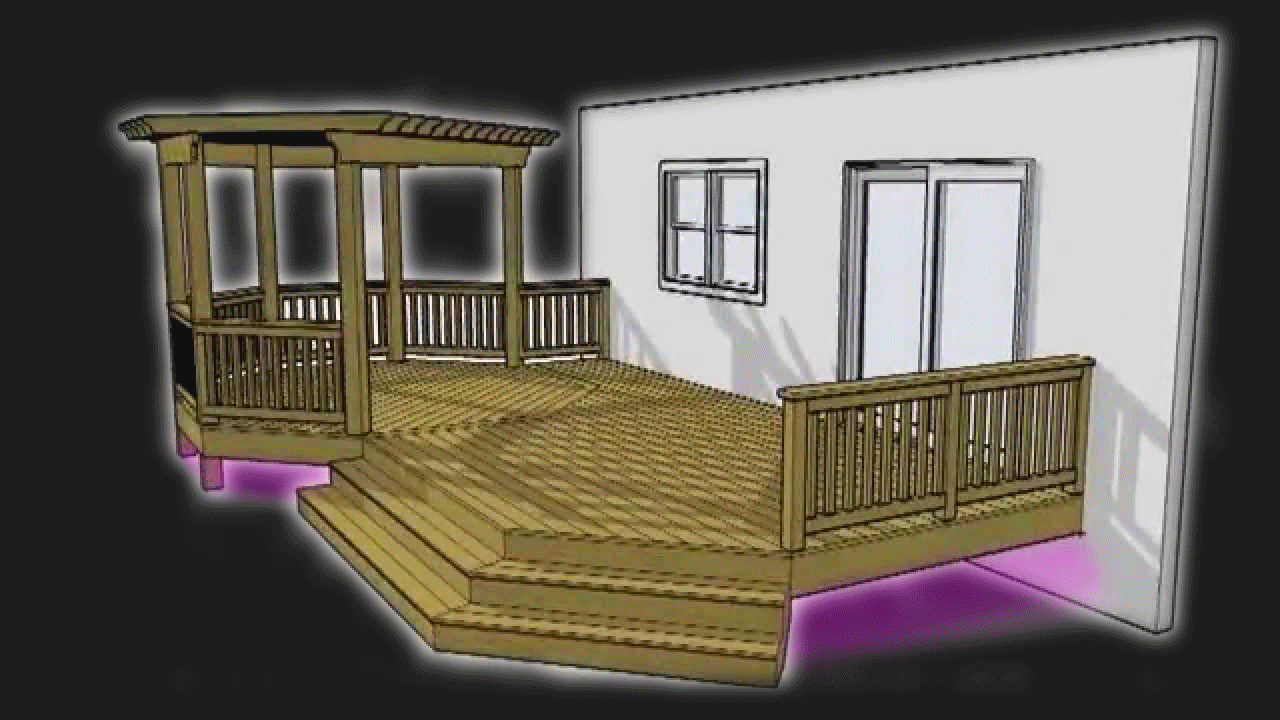
We now need to determine where to mount our Power/Control Box and also how we are going to run our extensions to the LEDs.
First of all we need to mount the Power/Control Box. Although the control box is weather resistant it should still be mounted up off the ground to avoid any standing water, and also under cover and out of the way of direct rain fall.
In the diagram above you can see that the Power/Control box is located toward the middle of the deck, this is not necessary however this way we dont need to run our wire as far.
We now need to figure out how we are going to connect the LEDs to our Power/Control box. Each LED type comes with its own set of rules for this step:
- RGB: 30ft off one line to Power/Control Box
- RGBW: 20ft off one line to Power/Control Box
- FLOW: 15ft off one line to Power/Control Box
What does this mean? For our flow application this simply means that we need to connect the LEDs back to the Power/Control Box every 15ft of LED track (This does NOT include wire length). For example if we had 45ft of LED Flow track we would need to connect back to the Power/Control box 3 times at the start of each of those 15ft runs.
Now we can determine how many 9ft or 21ft extensions we need in order to complete our project.